
Introduction
When developing a React Native application, you often need to store persistent data locally on the device. This ensures that your data remains available even after the application restarts. Common use cases include storing session tokens, JWT values, user preferences, and app configurations. AsyncStorage provides an excellent solution for this requirement - it's an asynchronous, persistent, key-value storage system specifically designed for React Native applications.
Project Setup
Let's start by creating a new React Native project:
npx create-expo-app@latest --template blank-typescript react-native-todo-app-asyncstorageNext, navigate to the project directory:
cd react-native-todo-app-asyncstorageInstalling Dependencies
It's important to note that AsyncStorage has been deprecated in the core React Native package. You'll need to install a third-party implementation. The most widely-used and recommended library is @react-native-async-storage/async-storage
npm install @react-native-async-storage/async-storageStarting the Development Environment
Launch your development environment with:
npx expo startNow let's explore some common AsyncStorage operations before building our Todo app! 🚀
Core Operations with AsyncStorage in React Native
AsyncStorage can only store string data. For objects and complex data structures, you must serialize them first. JSON.stringify() and JSON.parse() are perfect for this purpose.
First, import the library:
import AsyncStorage from '@react-native-async-storage/async-storage';Storing String Values
const storeData = async (value: string) => {
  try {
    await AsyncStorage.setItem('my-key', value);
  } catch (e) {
    // Handle error
  }
};
Reading String Values
const getData = async () => {
  try {
    const value = await AsyncStorage.getItem('my-key');
    if (value !== null) {
      // Value exists, use it here
    }
  } catch (e) {
    // Handle error
  }
};
Storing Object Values
const storeData = async (value: any) => {
  try {
    const jsonValue = JSON.stringify(value);
    await AsyncStorage.setItem('my-key', jsonValue);
  } catch (e) {
    // Handle error
  }
};
Reading Object Values
const getData = async () => {
  try {
    const jsonValue = await AsyncStorage.getItem('my-key');
    return jsonValue != null ? JSON.parse(jsonValue) : null;
  } catch (e) {
    // Handle error
  }
};
Removing Specific Data
const removeKey = async () => {
  try {
    await AsyncStorage.removeItem('my-key')
  } catch(e) {
    // Handle remove error
  }
};
Clearing All Stored Data
const clearAllData = async () => {
  try {
    await AsyncStorage.clear();
  } catch (e) {
    // Handle error
  }
};
Building a Todo App with AsyncStorage
Now, let's implement a complete Todo application that persists data using AsyncStorage*. This practical example will demonstrate real-world usage of AsyncStorage in a React Native app.
Step 1: Setting Up the Basic Structure
import React, { useState, useEffect } from 'react';
import {
  Text,
  View,
  TextInput,
  TouchableOpacity,
  FlatList,
  Keyboard,
  KeyboardAvoidingView,
  Platform,
  Alert,
  SafeAreaView,
} from 'react-native';
import { StatusBar } from 'expo-status-bar';
import AsyncStorage from '@react-native-async-storage/async-storage';

interface Todo {
  id: string;
  text: string;
  completed: boolean;
}

export default function App() {
  const [todos, setTodos] = useState<Todo[]>([]);
  const [text, setText] = useState('');

  // More code will go here...
}
Step 2: Implementing Storage Functions
Add these functions to load and save todos using AsyncStorage:
useEffect(() => {
  loadTodos();
}, []);

const loadTodos = async () => {
  try {
    const storedTodos = await AsyncStorage.getItem('todos');
    if (storedTodos !== null) {
      setTodos(JSON.parse(storedTodos));
    }
  } catch (error) {
    console.error('Error loading todos', error);
  }
};

const saveTodos = async (updatedTodos: Todo[]) => {
  try {
    await AsyncStorage.setItem('todos', JSON.stringify(updatedTodos));
  } catch (error) {
    console.error('Error saving todos', error);
  }
};
Step 3: Creating Task Management Functions
These functions handle adding, toggling, and deleting todo items:
const addTodo = () => {
  if (text.trim() === '') return;

  const newTodo: Todo = {
    id: Date.now().toString(),
    text: text.trim(),
    completed: false,
  };

  const updatedTodos = [...todos, newTodo];
  setTodos(updatedTodos);
  saveTodos(updatedTodos);
  setText('');
  Keyboard.dismiss();
};

const toggleTodo = (id: string) => {
  const updatedTodos = todos.map(todo =>
    todo.id === id ? { ...todo, completed: !todo.completed } : todo
  );
  setTodos(updatedTodos);
  saveTodos(updatedTodos);
};

const deleteTodo = (id: string) => {
  Alert.alert(
    'Delete Todo',
    'Are you sure you want to delete this item?',
    [
      { text: 'Cancel', style: 'cancel' },
      {
        text: 'Delete',
        onPress: () => {
          const updatedTodos = todos.filter(todo => todo.id !== id);
          setTodos(updatedTodos);
          saveTodos(updatedTodos);
        },
        style: 'destructive'
      }
    ]
  );
};
Step 4: Building the Todo Item Component
This function renders individual todo items with completion toggle and delete functionality:
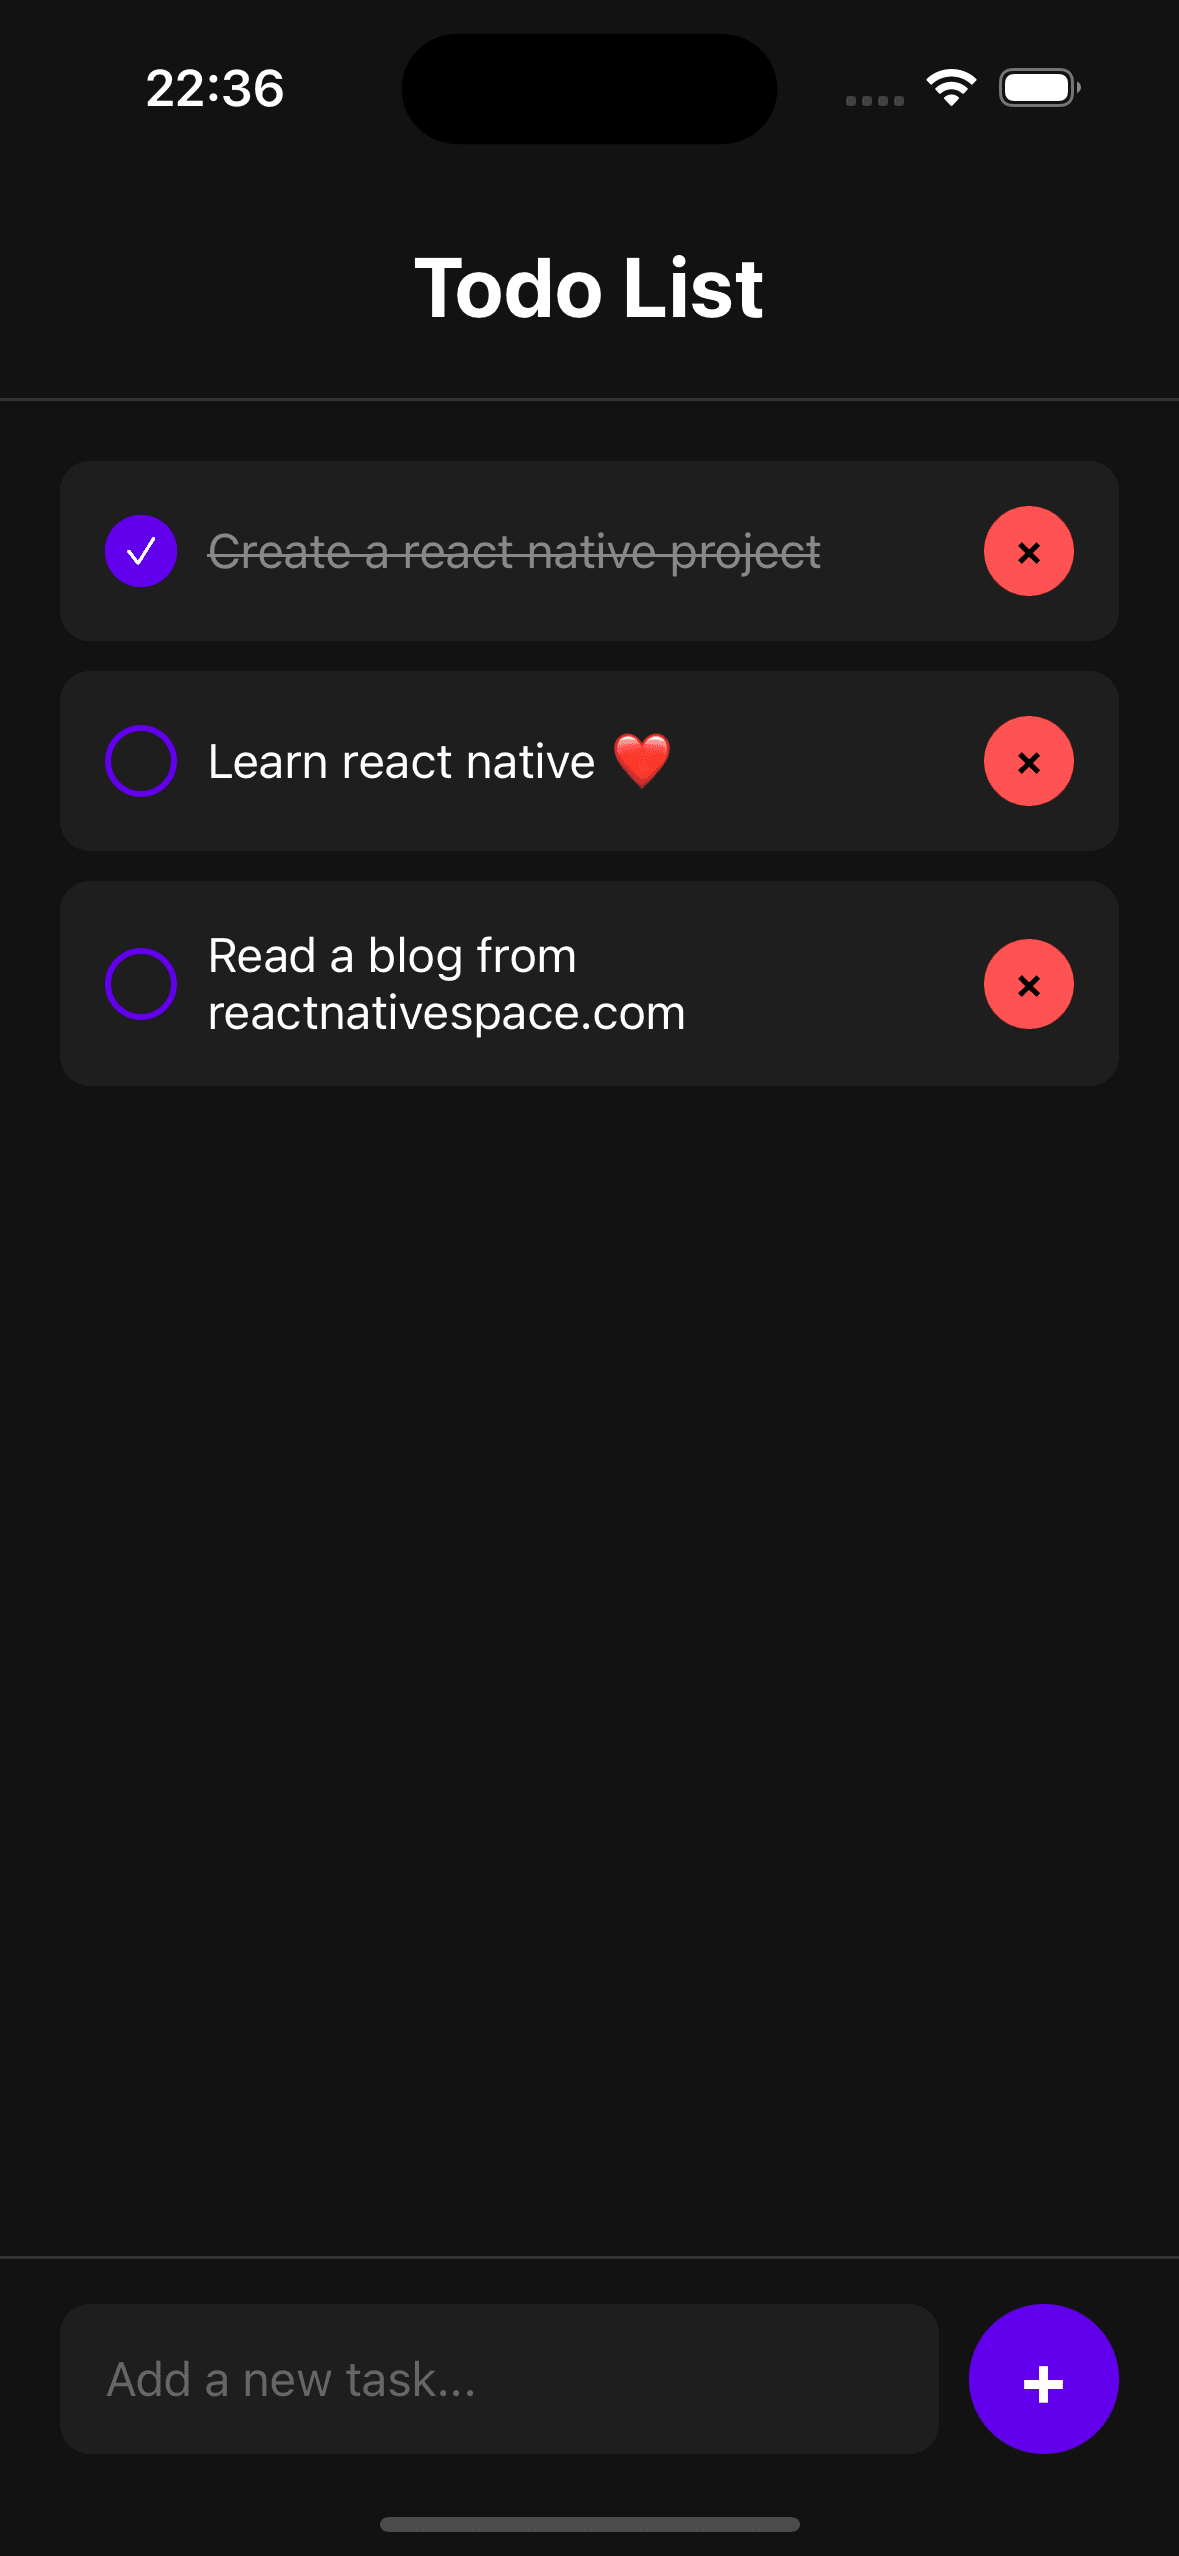
const renderItem = ({ item }: { item: Todo }) => (
  <View style={{
    flexDirection: 'row',
    alignItems: 'center',
    padding: 15,
    marginBottom: 10,
    backgroundColor: '#1e1e1e',
    borderRadius: 10,
  }}>
    <TouchableOpacity
      style={[{
        width: 24,
        height: 24,
        borderRadius: 12,
        borderWidth: 2,
        borderColor: '#6200ee',
        marginRight: 10,
        justifyContent: 'center',
        alignItems: 'center',
      }, item.completed && {
        backgroundColor: '#6200ee',
      }]}
      onPress={() => toggleTodo(item.id)}
    >
      {item.completed && <Text style={{
        color: 'white',
        fontSize: 14,
      }}>✓</Text>}
    </TouchableOpacity>
    <Text
      style={[
        {
          flex: 1,
          fontSize: 16,
          color: '#fff',
        },
        item.completed && {
          textDecorationLine: 'line-through',
          color: '#888',
        }
      ]}
      onPress={() => toggleTodo(item.id)}
    >
      {item.text}
    </Text>
    <TouchableOpacity
      style={{
        width: 30,
        height: 30,
        borderRadius: 15,
        backgroundColor: '#ff5252',
        justifyContent: 'center',
        alignItems: 'center',
      }}
      onPress={() => deleteTodo(item.id)}
    >
      <Text style={{fontWeight: 'bold'}}>×</Text>
    </TouchableOpacity>
  </View>
);
Step 5: Creating the Main UI
Finally, implement the complete user interface:
return (
  <>
    <SafeAreaView style={{
      flex: 1,
      backgroundColor: '#121212',
      padding: 8,
    }}>
      <View style={{
        padding: 20,
        borderBottomWidth: 1,
        borderBottomColor: '#333',
      }}>
        <Text style={{
          fontSize: 28,
          fontWeight: 'bold',
          color: '#fff',
          textAlign: 'center',
        }}>Todo List</Text>
      </View>

      <FlatList
        data={todos}
        renderItem={renderItem}
        keyExtractor={item => item.id}
        style={{ flex: 1 }}
        contentContainerStyle={{
          padding: 20,
        }}
      />

      <KeyboardAvoidingView
        behavior={Platform.OS === 'ios' ? 'padding' : 'height'}
        style={{
          paddingHorizontal: 20,
          paddingVertical: 15,
          flexDirection: 'row',
          borderTopWidth: 1,
          borderTopColor: '#333',
        }}
      >
        <TextInput
          style={{
            flex: 1,
            height: 50,
            backgroundColor: '#1e1e1e',
            color: '#fff',
            borderRadius: 10,
            paddingHorizontal: 15,
            fontSize: 16,
            marginRight: 10,
          }}
          placeholder="Add a new task..."
          placeholderTextColor="#666"
          value={text}
          onChangeText={setText}
          onSubmitEditing={()=> addTodo()}
        />
        <TouchableOpacity style={{
          width: 50,
          height: 50,
          borderRadius: 25,
          backgroundColor: '#6200ee',
          justifyContent: 'center',
          alignItems: 'center',
        }} onPress={()=> addTodo()}>
          <Text style={{
            color: 'white',
            fontSize: 24,
            fontWeight: 'bold',
          }}>+</Text>
        </TouchableOpacity>
      </KeyboardAvoidingView>
      <StatusBar style="light" />
    </SafeAreaView>
  </>
);
Source Code
You can access the complete source code for this project in our GitHub repository:
GitHub Repository LinkSecurity Considerations
Important: AsyncStorage is not encrypted by default. It's not recommended for storing sensitive information like passwords, credit card details, or personal identification data. For sensitive information, consider using secure storage alternatives like Expo SecureStore or react-native-keychain.
Project Dependencies
  "dependencies": {
    "@react-native-async-storage/async-storage": "^2.1.2",
    "expo": "~53.0.9",
    "expo-status-bar": "~2.2.3",
    "react": "19.0.0",
    "react-native": "0.79.2"
  },
  "devDependencies": {
    "@babel/core": "^7.25.2",
    "@types/react": "~19.0.10",
    "typescript": "~5.8.3"
  },
Conclusion
In this tutorial, we've explored how to use AsyncStorage in React Native to create persistent storage for a Todo application. AsyncStorage provides a simple yet powerful way to store key-value pairs locally on the device, allowing your app to maintain state between sessions.
We built a complete Todo app that demonstrates storing, retrieving, updating, and deleting data with AsyncStorage. This approach can be applied to many different types of applications that require local data persistence.
Remember that while AsyncStorage is great for most use cases, it's not suitable for sensitive information. Always use secure storage solutions for any confidential data your app might handle.
Now you have the knowledge to implement persistent storage in your own React Native applications. Happy coding!