
Introduction
If you want your React Native app to reach more people, you need to support multiple languages. Internationalization (i18n) helps you make your app friendly for users from different countries. In this tutorial, you will learn how to add multi-language support to a React Native app using the i18n-js library and Expo Router.
Creating Project
npx create-expo-app@latest --template blank-typescript react-multi-languageNext, navigate to the project directory:
cd react-native-multi-languageInstalling Dependencies
i18n-js is a small library to provide the i18n translations on the JavaScript, also we can use in React Native projects too 🌍🗣️🌐
npm i i18n-jsWe also need Expo Router and some other packages for navigation and UI:
npx expo install expo-router react-native-safe-area-context react-native-screens expo-linking expo-constants expo-status-bar expo-splash-screenUpdate the package json
{
  "name": "react-native-multi-language",
  "version": "1.0.0",
  "main": "expo-router/entry",
  //rest of file..
}
Update the app json
{
  "expo": {
    "scheme": "main-app-scheme",
    "name": "react-native-multi-language",
    "slug": "react-native-multi-language"
    //rest of file..
  }
}
Expo Router layout
import { Stack } from 'expo-router';
import * as SplashScreen from 'expo-splash-screen';
import { useEffect, useState } from 'react';
import {StatusBar} from "expo-status-bar";

SplashScreen.preventAutoHideAsync();

export default function RootLayout() {
   const [loaded, setLoaded] = useState(true);

    useEffect(() => {
        if (loaded) {
            SplashScreen.hideAsync();
        }
    }, [loaded]);

    if (!loaded) {
        return null;
    }

    return (
        <>
            <Stack>
                <Stack.Screen name="index" options={{ title: 'Home' }} />
                <Stack.Screen name="settings" options={{ title: 'Settings' }} />
            </Stack>
            <StatusBar style="dark" />
        </>
    );
}import {Text, TouchableOpacity, View} from 'react-native';
import { useRouter } from 'expo-router';
export default function Index() {
const router = useRouter();
return (
<View style={{
flex: 1,
alignItems: 'center',
justifyContent: 'center',
}}>
<TouchableOpacity onPress={() => router.navigate('/settings')}>
<Text>Go To Settings</Text>
</TouchableOpacity>
</View>
);
}import {Text, TouchableOpacity, View} from 'react-native';
import { useRouter } from 'expo-router';
export default function Settings() {
const router = useRouter();
return (
<View style={{
flex: 1,
alignItems: 'center',
justifyContent: 'center',
}}>
<TouchableOpacity onPress={() => router.back()}>
<Text>Go Back</Text>
</TouchableOpacity>
</View>
);
}
We can start our project, at this step if you can get an error, you can contact me!
npx expo startImplementation
For this tutorial, we will focus on four languages that English 🇬🇧, Deutsch 🇩🇪, Italian 🇮🇹 and Turkish 🇹🇷
Add Language Files
- Create a langs/ folder and add these files:
- langs/en.json (English)
- langs/de.json (German)
- langs/it.json (Italian)
- langs/tr.json (Turkish)
{
    "home": "Home",
    "settings": "Settings",
    "select-language": "Select Language",
    "english": "English",
    "german": "German",
    "italian": "Italian",
    "turkish": "Turkish",
    "fruits": "Fruits",
    "grapes": "Grapes",
    "watermelon": "Watermelon",
    "pear": "Pear",
    "pineapple": "Pineapple",
    "strawberry": "Strawberry",
    "peach": "Peach",
    "kiwi": "Kiwi",
    "cherries": "Cherries"
}{
"home": "Startseite",
"settings": "Einstellungen",
"select-language": "Sprache auswählen",
"english": "Englisch",
"german": "Deutsch",
"italian": "Italienisch",
"turkish": "Türkisch",
"fruits": "Obst",
"grapes": "Trauben",
"watermelon": "Wassermelone",
"pear": "Birne",
"pineapple": "Ananas",
"strawberry": "Erdbeere",
"peach": "Pfirsich",
"kiwi": "Kiwi",
"cherries": "Kirschen"
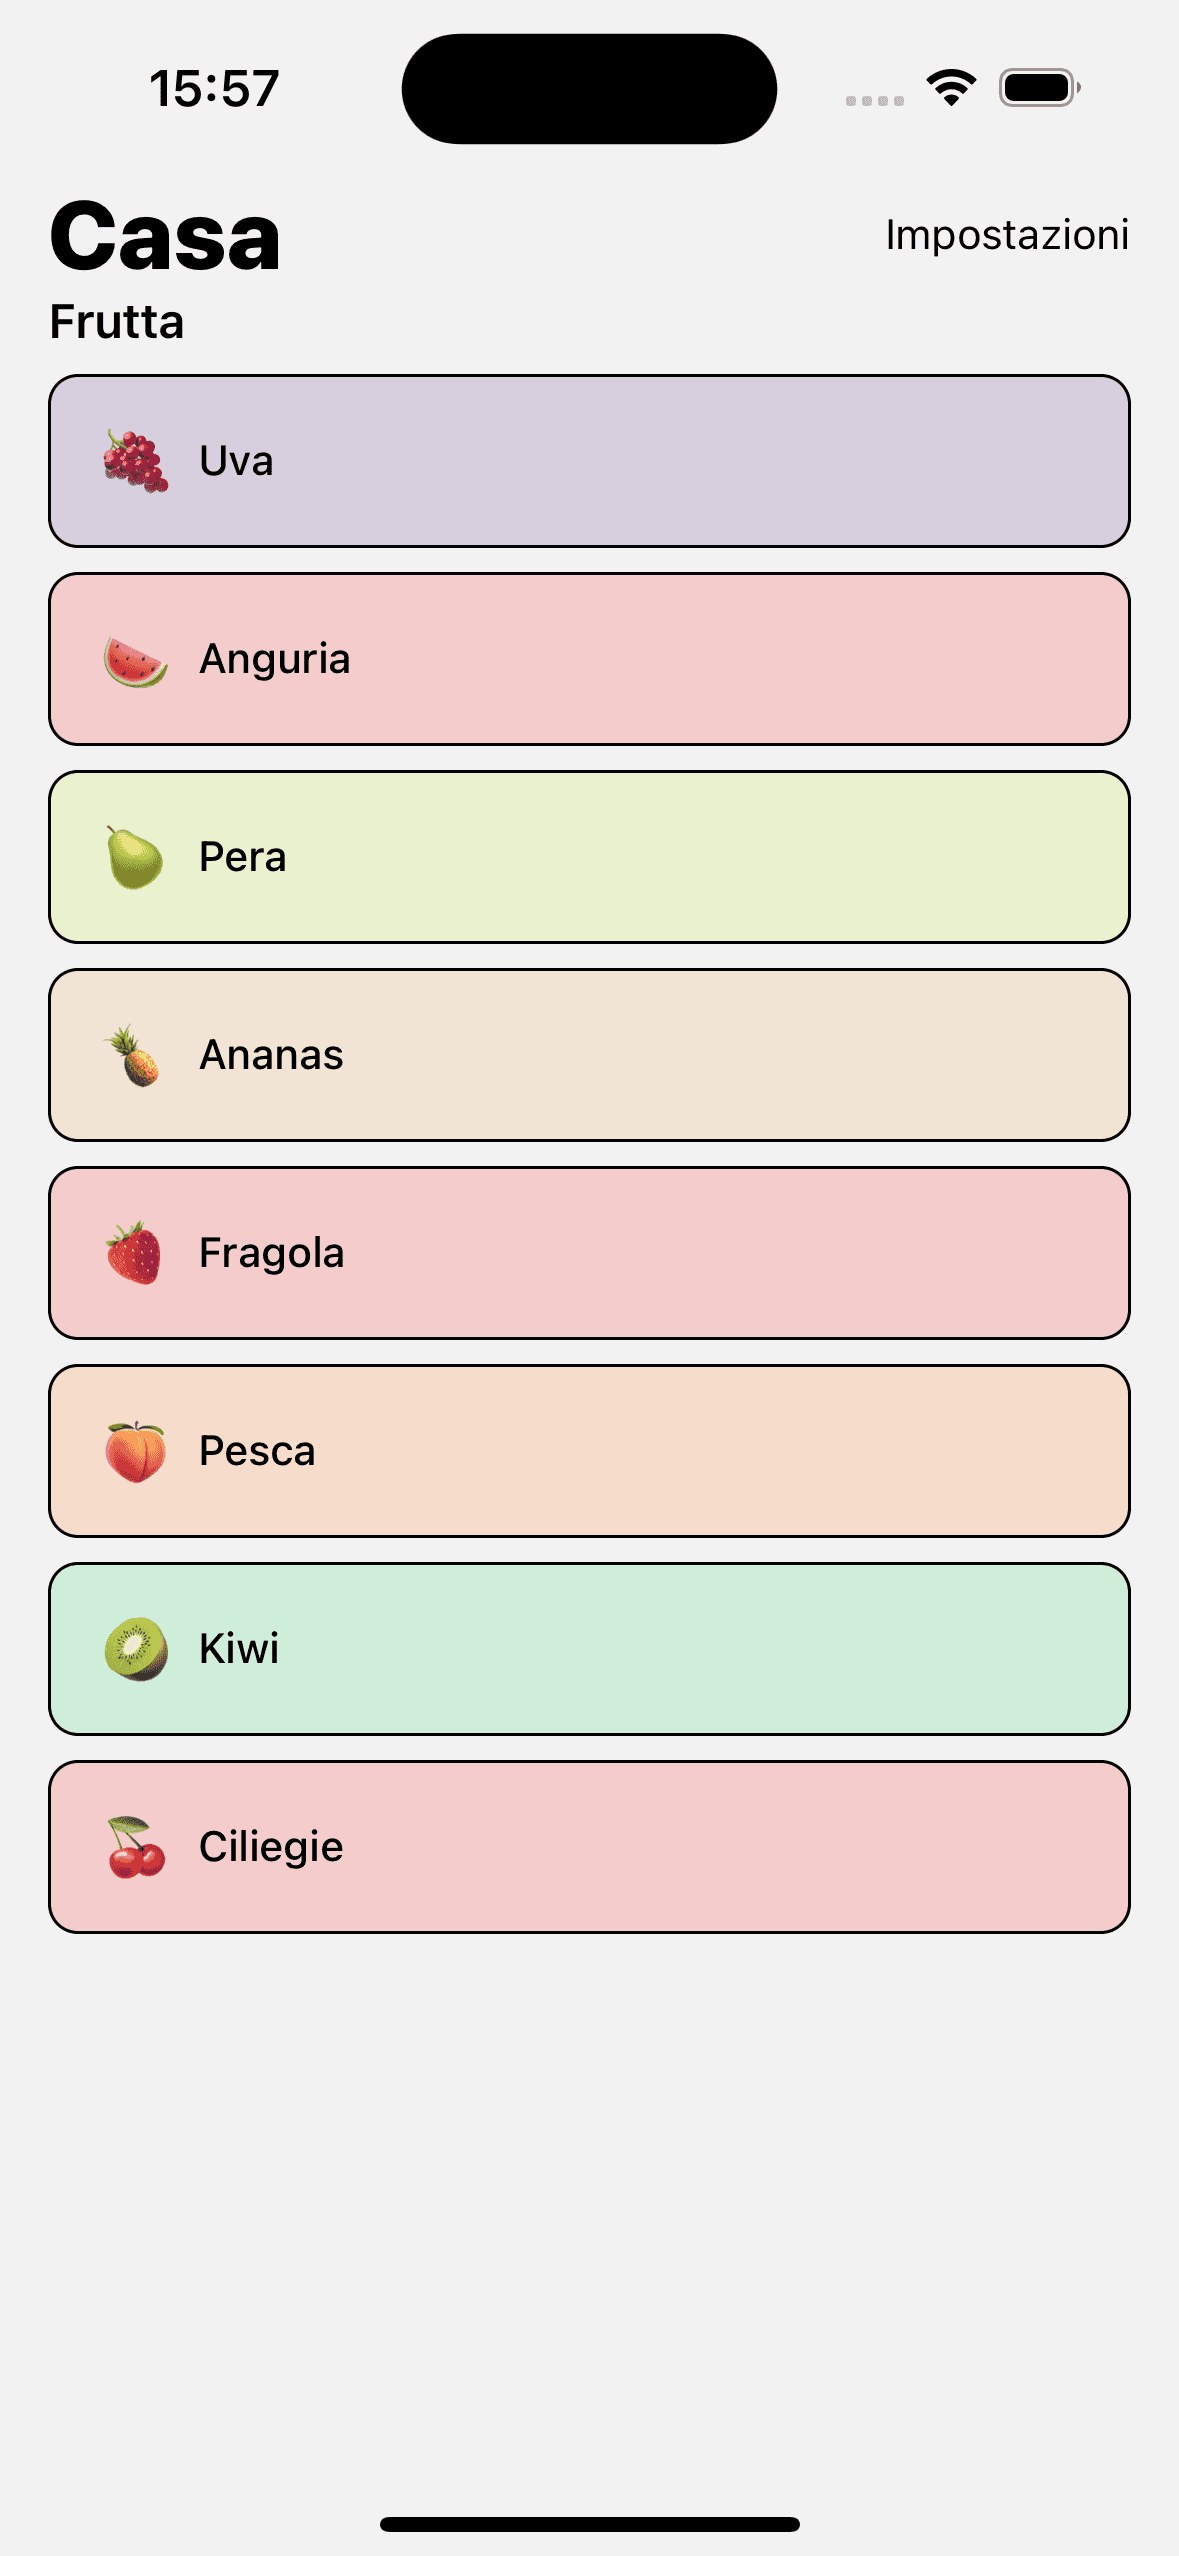
}{
"home": "Casa",
"settings": "Impostazioni",
"select-language": "Seleziona Lingua",
"english": "Inglese",
"german": "Tedesco",
"italian": "Italiano",
"turkish": "Turco",
"fruits": "Frutta",
"grapes": "Uva",
"watermelon": "Anguria",
"pear": "Pera",
"pineapple": "Ananas",
"strawberry": "Fragola",
"peach": "Pesca",
"kiwi": "Kiwi",
"cherries": "Ciliegie"
}{
"home": "Ana Sayfa",
"settings": "Ayarlar",
"select-language": "Dil Seçin",
"english": "İngilizce",
"german": "Almanca",
"italian": "İtalyanca",
"turkish": "Türkçe",
"fruits": "Meyveler",
"grapes": "Üzüm",
"watermelon": "Karpuz",
"pear": "Armut",
"pineapple": "Ananas",
"strawberry": "Çilek",
"peach": "Şeftali",
"kiwi": "Kivi",
"cherries": "Kiraz"
}To manage languages and language switching, we will use an AppContext so the all project pages can get the selected language and render itself
import { createContext } from "react";
export const AppContext = createContext<any>(null);import { Stack } from 'expo-router';
import * as SplashScreen from 'expo-splash-screen';
import { useEffect, useState, useMemo } from 'react';
import { StatusBar } from "expo-status-bar";
import { AppContext } from "../context/AppContext";
import { I18n } from 'i18n-js';
import en from '../langs/eng.json';
import de from '../langs/de.json';
import it from '../langs/it.json';
import tr from '../langs/tr.json';
SplashScreen.preventAutoHideAsync();
export default function RootLayout() {
const i18n = new I18n({ en, de, it, tr });
const [locale, setLocale] = useState('en');
const [loaded, setLoaded] = useState(true);
const appContext = useMemo(() => {
return {
t: (scope:any, options: any) => {
return i18n.t(scope, { locale, ...options });
},
locale,
setLocale
}
}, [locale]);
useEffect(() => {
if (loaded) {
SplashScreen.hideAsync();
}
}, [loaded]);
if (!loaded) {
return null;
}
return (
<AppContext.Provider value={appContext}>
<Stack>
<Stack.Screen name="index" options={{ headerShown: false }} />
<Stack.Screen name="settings" options={{ headerShown: false }} />
</Stack>
<StatusBar style="dark" />
</AppContext.Provider>
);
}
import {Text, TouchableOpacity, View} from 'react-native';
import { useRouter } from 'expo-router';
import { AppContext} from "../context/AppContext";
import React, { useContext } from "react";
import {SafeAreaView} from "react-native-safe-area-context";
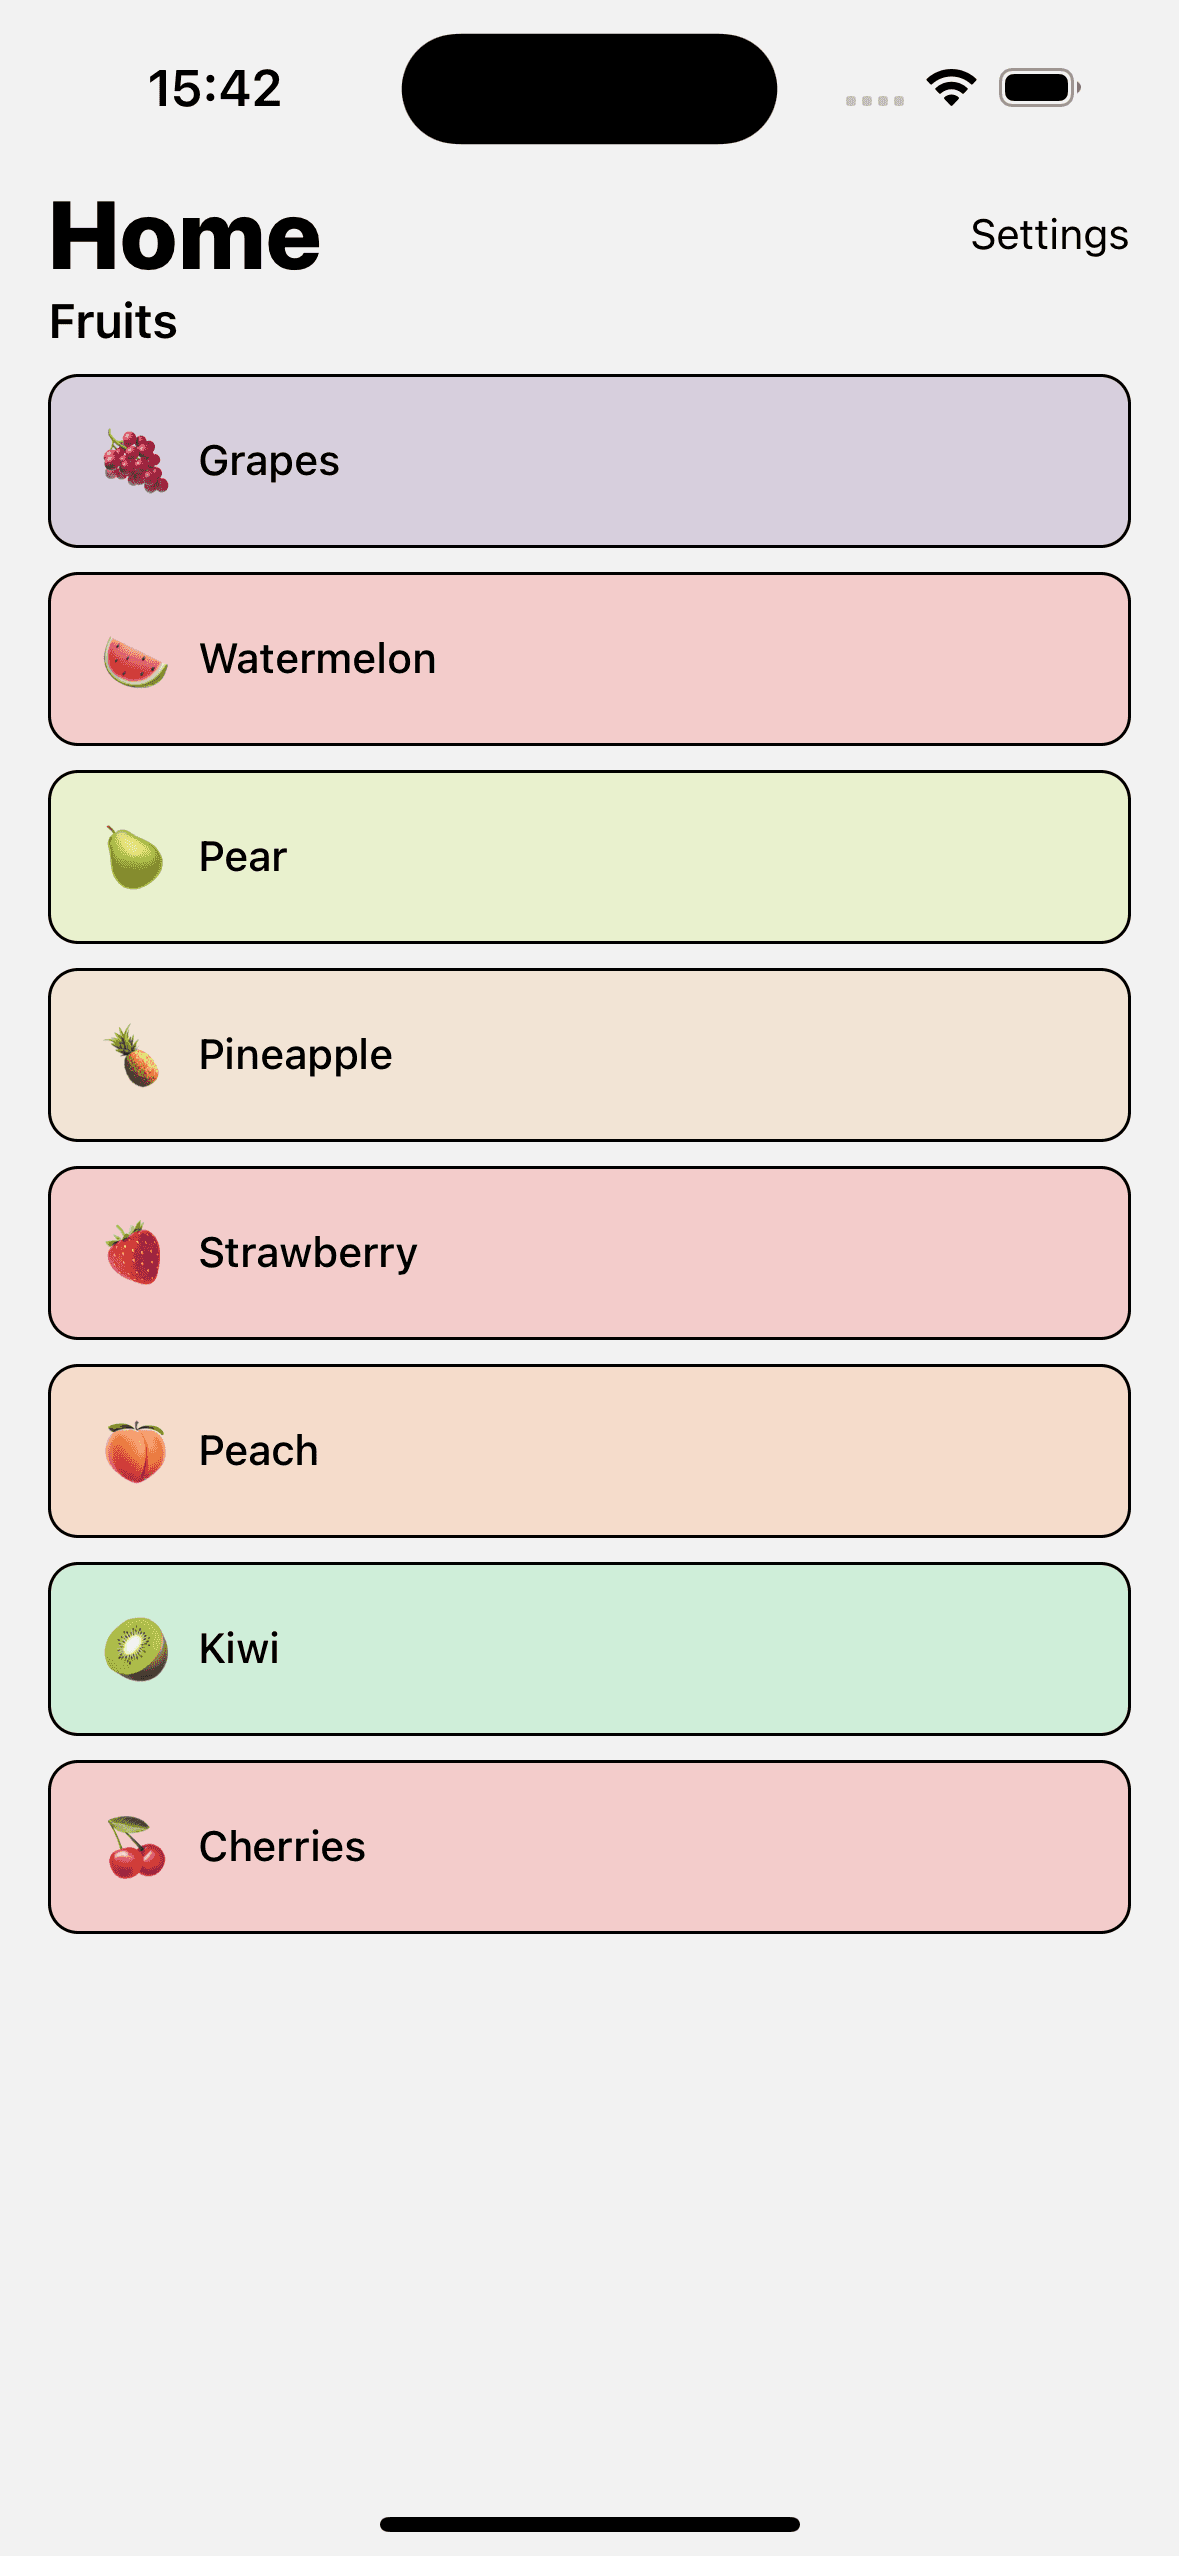
export default function Index() {
const router = useRouter();
const { t } = useContext(AppContext);
const fruits = [
{ id: 1, icon: '🍇', value: 'grapes', background: 'rgba(107, 67, 139, 0.2)' },
{ id: 2, icon: '🍉', value: 'watermelon', background: 'rgba(248, 49, 47, 0.2)' },
{ id: 3, icon: '🍐', value: 'pear', background: 'rgba(195, 239, 60, 0.2)' },
{ id: 4, icon: '🍍', value: 'pineapple', background: 'rgba(243, 173, 96, 0.2)' },
{ id: 5, icon: '🍓', value: 'strawberry', background: 'rgba(248, 49, 47, 0.2)' },
{ id: 6, icon: '🍑', value: 'peach', background: 'rgba(255, 130, 45, 0.2)' },
{ id: 7, icon: '🥝', value: 'kiwi', background: 'rgba(69, 224, 118, 0.2)' },
{ id: 8, icon: '🍒', value: 'cherries', background: 'rgba(246, 50, 47, 0.2)' }
]
return (
<SafeAreaView style={{
flex: 1,
paddingHorizontal: 16,
}}>
<View style={{
flexDirection: 'row',
alignItems: 'center',
justifyContent: 'space-between'
}}>
<Text style={{
fontSize: 32,
fontWeight: '800'
}}>{t('home')}</Text>
<TouchableOpacity onPress={() => router.navigate('/settings')}>
<Text>{t('settings')}</Text>
</TouchableOpacity>
</View>
<Text style={{ fontSize: 16, fontWeight: '600' }}>{t('fruits')}</Text>
{fruits.map(item => <View
key={item.id}
style={{
backgroundColor: item.background,
flexDirection: 'row',
alignItems: 'center',
padding: 16,
borderWidth: 1,
marginTop: 8,
borderRadius: 10
}}>
<Text style={{ fontSize: 20 }}>{item.icon}</Text>
<Text style={{ marginLeft: 8, fontWeight: 500 }}>{t(item.value)}</Text>
</View>)}
</SafeAreaView>
);
}
import { View, Text, TouchableOpacity } from 'react-native'
import { useRouter } from 'expo-router';
import React, { useContext } from "react";
import { AppContext } from "../context/AppContext";
import { SafeAreaView } from "react-native-safe-area-context";
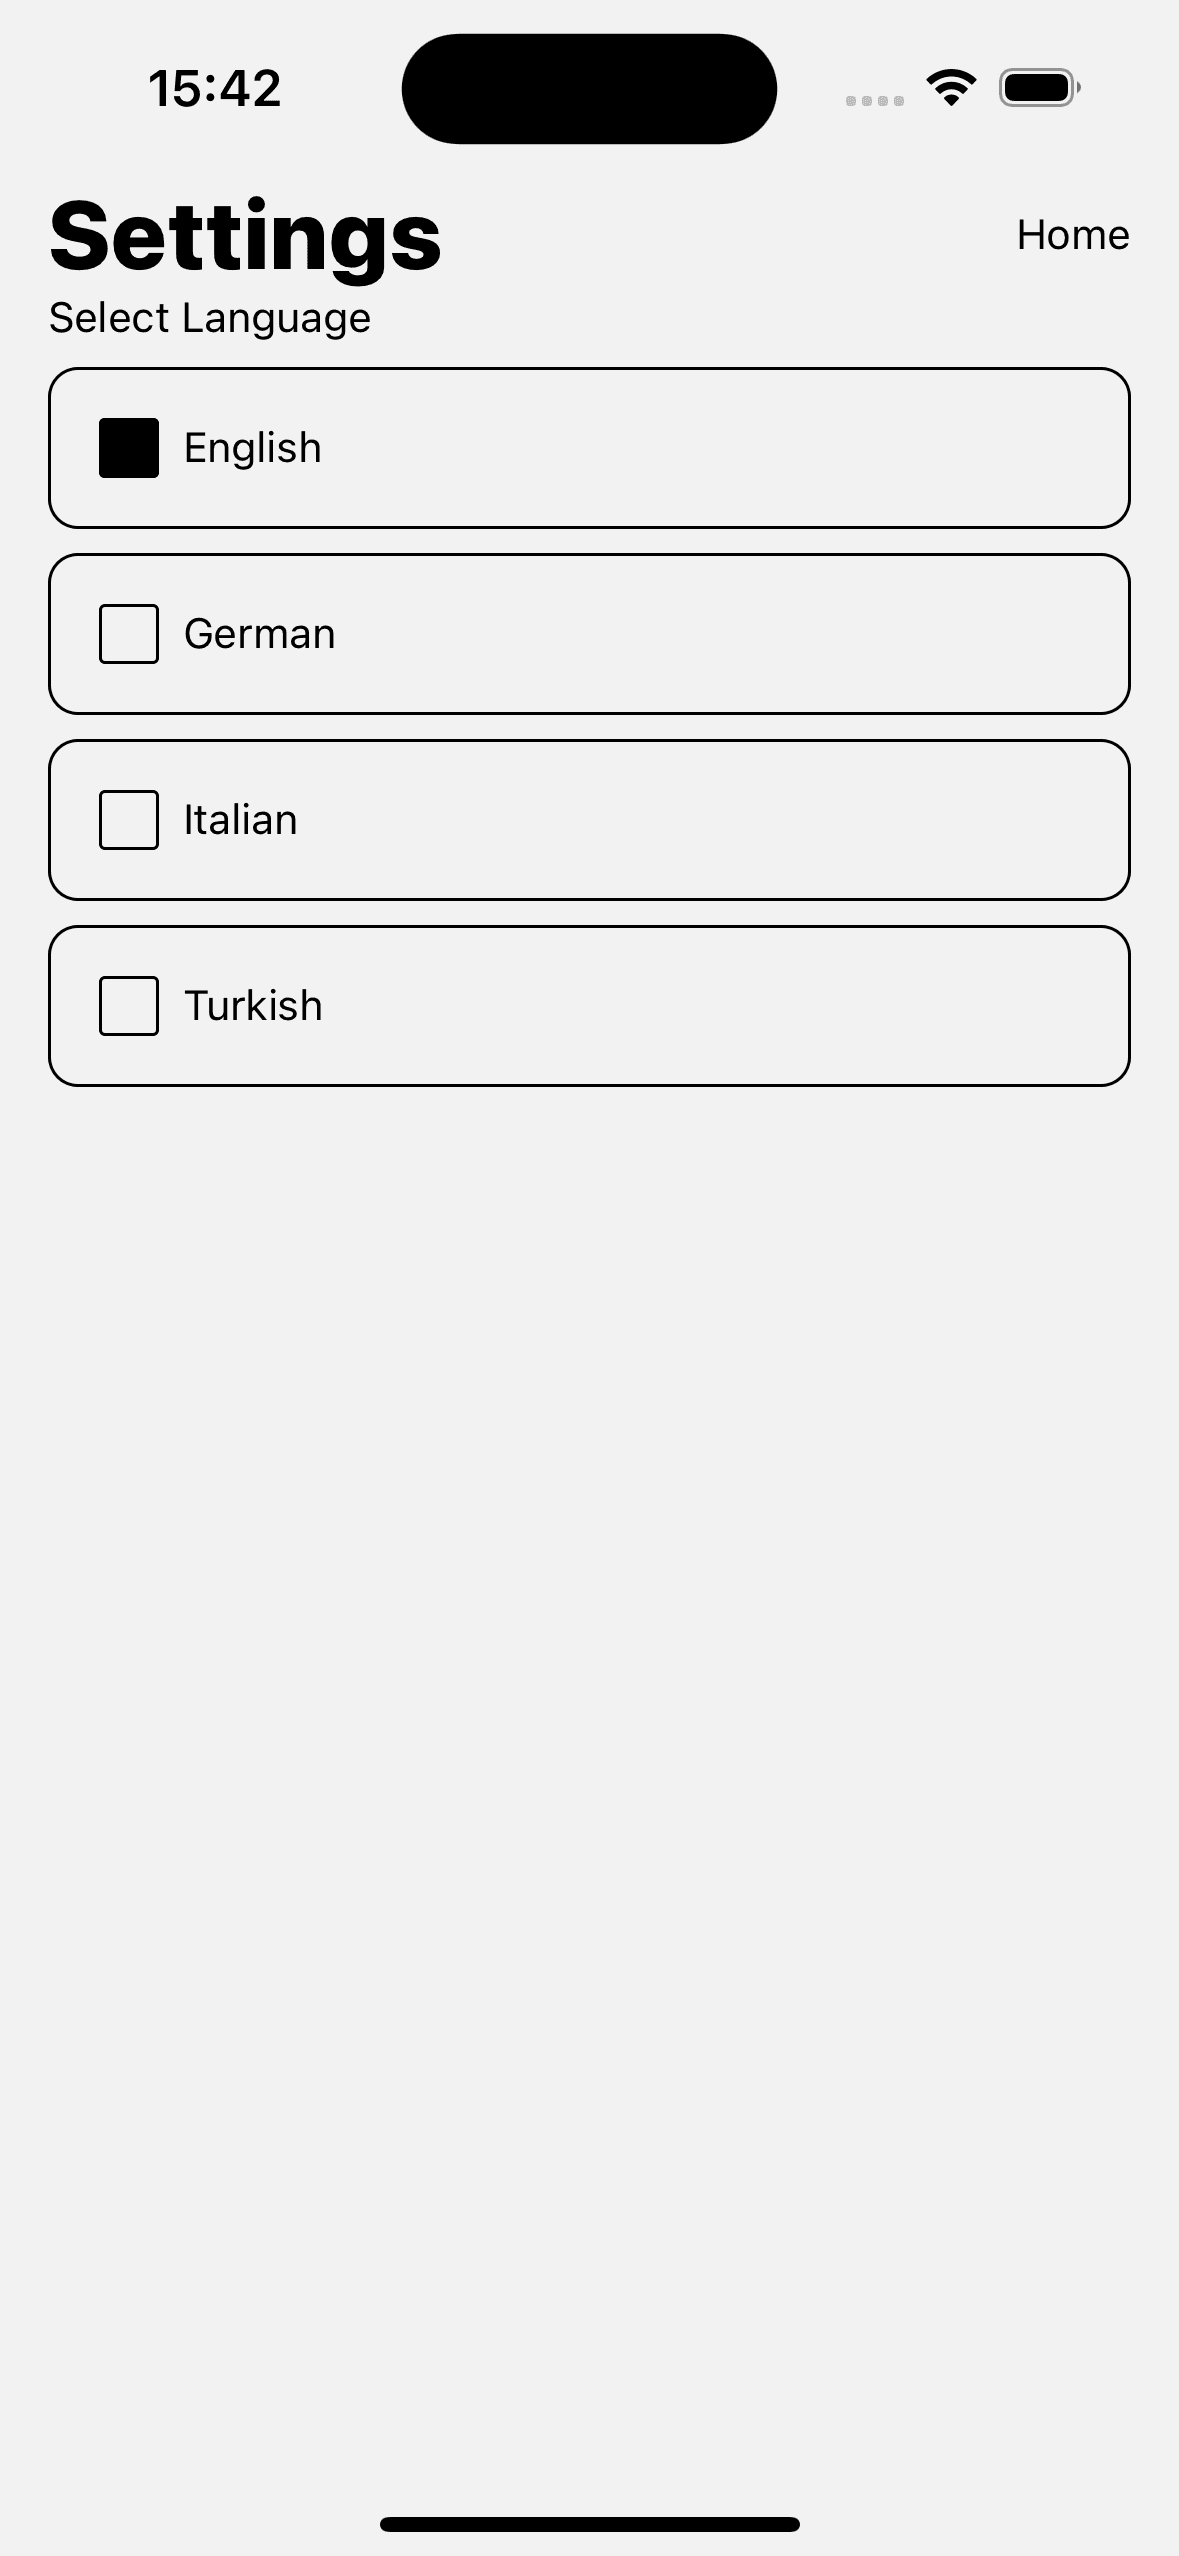
export default function Settings() {
const router = useRouter();
const { t, locale, setLocale } = useContext(AppContext);
const languages = [
{ id: 'en', value: 'english' },
{ id: 'de', value: 'german' },
{ id: 'it', value: 'italian' },
{ id: 'tr', value: 'turkish' }]
return (
<SafeAreaView style={{
flex: 1,
paddingHorizontal: 16,
}}>
<View style={{
flexDirection: 'row',
alignItems: 'center',
justifyContent: 'space-between'
}}>
<Text style={{
fontSize: 32,
fontWeight: '800'
}}>{t('settings')}</Text>
<TouchableOpacity onPress={() => router.back()}>
<Text>{t('home')}</Text>
</TouchableOpacity>
</View>
<Text>{t('select-language')}</Text>
{languages.map(item =>
<TouchableOpacity
key={item.id}
style={{
flexDirection: 'row',
alignItems: 'center',
padding: 16,
borderWidth: 1,
marginTop: 8,
borderRadius: 10
}}
onPress={() => setLocale(item.id)}>
<View style={{
width: 20,
height:20,
borderRadius: 2,
borderWidth: 1,
backgroundColor: locale === item.id ? '#000' :'transparent',
}}/>
<Text style={{ marginLeft: 8 }}>{t(item.value)}</Text>
</TouchableOpacity>)}
</SafeAreaView>
);
}
We have imported all the languages and initialized the i18n object. The t function is responsible for handling translations. We have also shared the t function through the AppContext, making it accessible to all screens via the AppContext. The setLocale function is used to update the translation value, which can be set to en, de, it, or tr in the code.
Project Dependencies
  "dependencies": {
    "expo": "~53.0.9",
    "expo-status-bar": "~2.2.3",
    "i18n-js": "^4.5.1",
    "react": "19.0.0",
    "react-native": "0.79.2",
    "expo-router": "~5.0.7",
    "react-native-safe-area-context": "5.4.0",
    "react-native-screens": "~4.10.0",
    "expo-linking": "~7.1.5",
    "expo-constants": "~17.1.6",
    "expo-splash-screen": "~0.30.8"
  },
  "devDependencies": {
    "@babel/core": "^7.25.2",
    "@types/react": "~19.0.10",
    "typescript": "~5.8.3"
  },
Source Code
Github Repository LinkConclusion
Adding multi-language support to your React Native app is important for reaching more users worldwide. With i18n-js and Expo Router, you can easily switch languages and make your app more user-friendly. Try these steps in your own project and make your app ready for a global audience!